Step 1 - Measure & cut your cardstock to size, then work out where you want to stamp and how big the space needs to be. Mark this on the back on your cardstock with pencil.

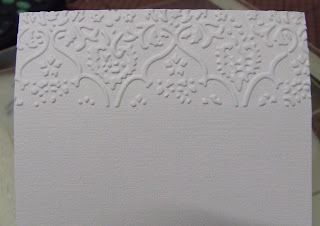
Step 2 - Place cardstock in embossing folder, using pencil marks to line it up straight. **Remember you are working at the back of the cardstock, so make sure you have your embossing folder facing backwards** Run through Cuttlebug (or other die-cut machine).

It should look like this.

Step 3 - Turn cardstock around, repeat step 2 and emboss other end.

Now your cardstock should look like this.

Step 4 - Turn cardstock face down and score along pencil marks to make lines at the top and bottom of the stamping panel.

Step 5 - Stamp on panel to finish :)

I hope you have found this easy to understand and helpful. Let me know if you try the tutorial :)
1 comment:
This looks great. I hadn't thought of doing this but will give it a go. Thanks.
Post a Comment